Secure Your Tablets with Ease:
In today’s fast-paced business environment, safeguarding valuable technology is essential. The Yoi-Lock Anti-Theft Tablet Wall Mount offers a robust solution to protect your tablets from theft and unauthorized access. What sets Yoi-Lock apart is not just its security features, but also the simplicity and ease of its installation. Let’s walk through the step-by-step process of installing the Yoi-Lock on your business premises.
Why Choose Yoi-Lock?


Before we dive into the installation, let’s quickly recap why the Yoi-Lock is a must-have for businesses:
- Ultimate Security: Provides unmatched protection with a secure lock and tamper-resistant design.
- Versatile Compatibility: Fits a wide range of 7 to 11-inch tablets, including iPads and Galaxy Tabs.
- Enhanced Productivity: Keeps tablets accessible yet secure, boosting efficiency.
- Sleek Design: Blends seamlessly into any business environment.
Step-by-Step Installation Guide
Step 1: Gather Your Tools
Before you begin, ensure you have the following tools:
- A power drill
- Drill bits
- Screwdriver
- Level
- Pencil or marker
- Measuring tape
Step 2: Unbox Your Yoi-Lock
Carefully unbox your Yoi-Lock and ensure all parts are present:
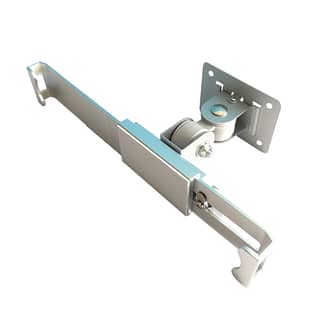
- Wall mount bracket
- Adjustable tablet holder
- Lock and key set
- Screws and wall anchors
Step 3: Choose the Mounting Location
Select a suitable location on your wall. Consider the following:
- Accessibility: Ensure the tablet will be at a convenient height for use.
- Visibility: Place the mount in a visible area for easy monitoring.
- Surface: Choose a sturdy wall that can support the mount and tablet.
Step 4: Mark the Mounting Points
Use the wall mount bracket as a template. Hold it against the wall at the desired height and use a level to ensure it’s straight. Mark the screw holes with a pencil or marker.
Step 5: Drill the Holes
Using the appropriate drill bit, drill holes at the marked points. If you’re drilling into drywall, use wall anchors to ensure the mount is securely attached.
Step 6: Attach the Wall Mount Bracket
Position the wall mount bracket over the drilled holes and insert the screws. Tighten them using a screwdriver, ensuring the bracket is firmly secured to the wall.
Step 7: Install the Adjustable Tablet Holder
Attach the adjustable tablet holder to the wall mount bracket. The holder should click or lock into place. Ensure it is securely attached before proceeding.
Step 8: Secure the Tablet
Place your tablet into the holder and adjust the brackets to fit snugly. Use the lock and key to secure the tablet in place. The Yoi-Lock’s tamper-resistant design ensures that once locked, the tablet cannot be removed without the key.
Step 9: Test the Installation
Give the mount a gentle tug to ensure it is securely attached to the wall. Test the lock mechanism by attempting to remove the tablet. Make any necessary adjustments to ensure the mount is secure and the tablet is locked in place.
Conclusion
Installing the Yoi-Lock Anti-Theft Tablet Wall Mount is a straightforward process that can be completed in just a few minutes. With its easy installation, robust security features, and sleek design, the Yoi-Lock is the perfect solution for businesses looking to protect their valuable technology. Enhance your business’s security and efficiency by installing Yoi-Lock today – your peace of mind is worth it.
By following these simple steps, you can ensure that your tablets are both secure and easily accessible, allowing your business to operate smoothly and securely. Invest in the Yoi-Lock and experience the difference it makes in safeguarding your technology..
-
Product on sale
 Yoi Lock Anti-Theft tablet wall mountOriginal price was: $99.99.$69.99Current price is: $69.99.